A brief introduction to a tool you’ll love
I promised the other week to give you a short and easy introduction for Airtable and so there we are.
This introduction is for you if you are a Surface Pattern Designer (beginner or pro doesn´t matter) and if you want to organize your growing portfolio. So just sit back, grab a cup of coffee, relax and scroll down! Have fun!

We all hate Excel, don´t we?
Actually not. I know that many designers actually love numbers and are organizing their files pretty well. But many are not. Many of us even hate everything table-based and can´t handle it. I see you. But now we have a tool at our hand that will help us organizing whatever we want without hating the tool. 😉

Welcome to Airtable
Airtable is an online-based tool (find it under: www.airtable.com) which has some advantages and some disadvantages.
Good: you have all your data always available. You don´t have to save anything, it´s always at your hand.
Bad: you have to download every single table as cvs to really posess it. Have that in mind and be careful.
Good: you can use Airtable for free until you have more than 1.000 entries in one table, than you have to expand to pro mode and pay a monthly fee (right now it´s about $ 12.00/month). If you have more than 5.000 entries, you have to expand your monthly plan even further and have to pay more. I just changed from free to paid and yes – I don´t really like it but for me it´s worth it. And there are possibilites to stay under 1.000 entries I will explain to you later.
How does Airtable work?
First, you have to register. Then you create and name your workspace, eg “surface pattern design”. 
Inside your workspace you can create different tables. We wanna keep it very simple and start with one. So we create a so called base and call it Pattern Catalogue (or whatever you want). 
Inside your base you create a table. Be careful: one of the strengthes of Airtable is that you can link one table to another one but only inside a base. So let´s keep everything inside base Nr. 1 for now. I create a table named “Pattern” (as you see I also have a table for solids and some more).
How can you organize your portfolio?
It´s easy. Keep in mind to keep it as simple as possible to avoid procrastination later. From now on you will work with this tool every day and keep it updated. Otherwise it´s completely useless. If you don´t want to work with it daily, just stop reading. Believe me, it´s a waste of time.

Still here? Okay, let´s go. I´ll take my own portfolio as an example. My first table is “Pattern”. Here I collect all the information I need to organize my pattern portfolio. A table with the following columns: Design Name, Design ID, Pic, Category, Theme, Repeat, Main Colors, Date, POD, promoted, utilized, sales, comments tbc
For the beginning we will concentrate on Design Name, Design ID, Category, Theme and Date.

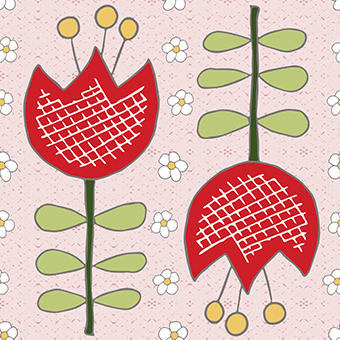
Design Name: click on the header of the first column and chose “edit field”. Type in “Design Name” and in the drop down menu chose “single line text”. Try it out and give your pattern a name, eg “Red tulips on pink”.
Next column is Design ID. This will also be “single line text”. The ID of this design is CB22-0050 (I´ll explain my system of design ID´s in the next blog post).
Next column is Pic. In the edit field choose “Attachment”. Upload a very small picture of your design, just so that it´s recognizable. I try and keep it under 0,5 MB or smaller. HInt: to minimize entries, you can collect design or color variants in one entry and upload several pictures. I don´t do that because every color variation of a design has an own Design ID in my system. But it´s absolutely possible and could save you some money because you keep your number of entries low, so keep that in mind.
Next column is Category. In the drop down menu of “edit field” please choose “Multiple Select”. Than you have to define some options. Our design is “Floral”. Examples for pattern categories are Abstract, Botanical, Chevron, Novelty, Geometric, Gingham, Seasonal. Feel free, this will not be Wikipedia but a tool YOU work with. And remember that you can change things later to adjust this tool to your need.
Next column is Theme. This one is also a “Multiple Select” column. Our design could be “Tulip” or “Spring” or both. Try to narrow it down a bit, it will make finding designs later so much easier, especially when you don´t work with Design IDs (I highly recommend the latter).
Last column is Date. In “edit field” please choose “Date”. Our tulips were created yesterday, so just fill this in.